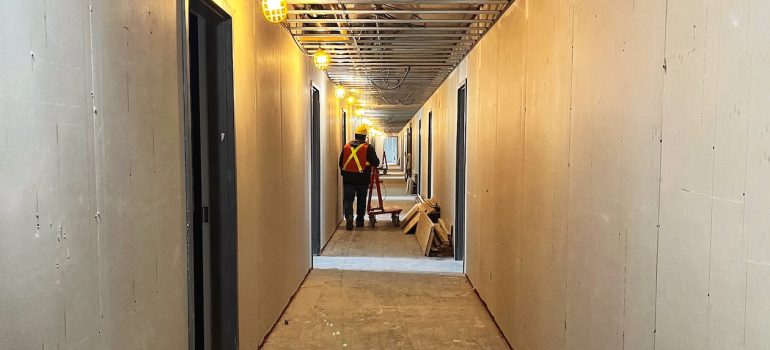
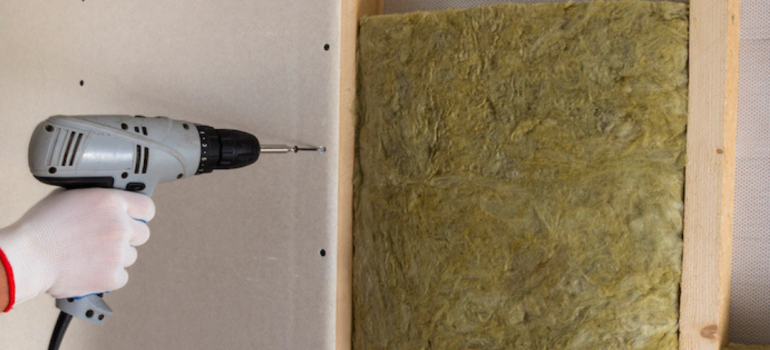
drywall durability

Drywall Durability: The Secret to a Low-Maintenance Home

When it comes to creating a comfortable and low-maintenance home, durability is a key factor to consider. A durable home not only stands the test of time but also reduces the need for constant repairs and maintenance. One often-overlooked hero in this quest for durability is drywall. In this guide, we’ll uncover the secrets behind drywall’s durability and how it can lead to a low-maintenance home.

Understanding the Foundation: The Role of Drywall

Drywall, also known as gypsum board or plasterboard, serves as the canvas for the walls and ceilings of your home. It’s an essential building material that provides a smooth, paintable surface. But drywall is more than just a surface; it’s the backbone of your interior spaces.

The Recipe for Resilience: What Makes Drywall Durable

  1. Resistant to Cracks and Dents

    Drywall is designed to withstand the everyday wear and tear of a home. It resists cracks and dents, maintaining the integrity of your walls and ceilings, even in high-traffic areas. This durability means less need for touch-ups and repairs over the years.

  2. Fire-Resistant Properties

    One of the remarkable features of drywall is its fire-resistant nature. In the event of a fire, drywall can slow the spread of flames, providing valuable time for safe evacuation. This built-in fire resistance contributes to the safety and long-term durability of your home.

  3. Soundproofing Abilities

    Drywall can also serve as an effective sound barrier. By reducing the transmission of noise between rooms, it contributes to a quieter and more peaceful living environment. You can enjoy a low-maintenance home without the disturbances of sound-related issues.

  4. Moisture Resistance

    In areas prone to moisture, such as bathrooms and kitchens, moisture-resistant drywall is a key player. It’s designed to resist the effects of dampness and humidity, which can cause other materials to deteriorate. With moisture-resistant drywall, you can have confidence in your home’s long-term durability, even in moisture-prone spaces.

The Cost-Effective Choice: Long-Term Savings with Drywall

The initial investment in high-quality drywall pays off in the long run. Its durability and low-maintenance nature translate to significant savings over the years. With less need for repairs and replacements, you can allocate your budget to other aspects of your home.

Maximizing Durability with Proper Installation

  1. Professional Installation Matters

    While durable drywall is crucial, proper installation is equally essential. The skills and expertise of a professional installer ensure that your drywall performs at its best and maintains its resilience over time.

  2. Sealing and Painting

    Adding an extra layer of protection, such as sealing and painting your drywall, can enhance its durability. Sealing the drywall with a primer and applying high-quality paint not only adds to its longevity but also contributes to the aesthetics of your home.

  3. Maintenance and Repairs

    While drywall is low-maintenance, it’s not entirely maintenance-free. Regular inspection and addressing minor issues promptly can prevent more extensive and costly repairs in the future. Keeping an eye on your drywall ensures it continues to serve as the backbone of your low-maintenance home.

A Showcase of Durability: Project Examples

  1. Residential Homes

    Drywall is the backbone of residential interiors. From living rooms to bedrooms and kitchens, it endures daily use, maintaining the look and feel of your home for years. With the right care and maintenance, it contributes to a low-maintenance lifestyle.

  2. Commercial Spaces

    Commercial spaces, including offices and retail stores, rely on the durability of drywall to create professional and inviting environments. In high-traffic areas, its resilience stands up to the demands of daily operations, requiring minimal upkeep.

Conclusion

Drywall is more than just a surface; it’s the secret to a low-maintenance home. Its inherent durability, resistance to damage, and fire-resistance properties provide a reliable and long-lasting foundation for your living space. By investing in high-quality drywall and ensuring proper installation and maintenance, you can enjoy a low-maintenance home for years to come.

To experience the benefits of a low-maintenance home with the enduring power of drywall, contact RGZ Cambridge today. With over 20 years of experience in both residential and commercial projects, we specialize in creating durable and efficient interiors. Choose durability, choose reliability, choose RGZ Cambridge for your next project.

Read More
replace your drywall

5 Signs It’s Time to Replace Your Drywall

Your home is a place of comfort, safety, and memories. It’s only natural that you’d want to maintain its structural integrity and aesthetic appeal. Central to these is the condition of your drywall, which forms the canvas for your home’s interior. Over time, however, even the best drywall can deteriorate or suffer damage. So, how can you discern when it’s time for a replacement? Let’s explore five telling signs.

1. Persistent Mold and Mildew Growth

The Dreaded Black Spots:
Mold and mildew are more than just unpleasant to look at – they can pose serious health risks. While it’s possible to treat minor mold issues without tearing out your drywall, persistent, recurring mold patches, especially black mold, are a different story.

Why It Matters:
Mold spores can aggravate allergies, lead to respiratory issues, and negatively impact overall indoor air quality. Additionally, if mold has infiltrated your drywall, it often indicates a deeper moisture problem.

2. Visible Holes or Cracks

Beyond the Cosmetic:
Small dings and nail holes can be easily repaired with a bit of joint compound. However, large holes, or cracks that seem to be spreading, might suggest more serious structural issues, especially if they reappear after being repaired.

A Structural Concern:
Large holes compromise the insulation properties of your drywall and may impact energy efficiency. Expanding cracks, on the other hand, can indicate potential foundation or settling issues that need attention.

3. Water Damage or Staining

The Telltale Stains:
Dark, discolored patches on your drywall often point to water damage. This can be due to a leaky roof, broken pipe, or even high humidity in rooms like bathrooms or basements.

Long-term Ramifications:
Water-damaged drywall loses its structural integrity. If it feels soft to the touch or starts to crumble, it’s beyond the point of a simple repair. Furthermore, where there’s moisture, mold isn’t far behind.

4. Wall Swelling or Bulging

The Unnatural Curve:
A wall that’s no longer flat and exhibits bulges or swellings often indicates underlying issues. This could be due to water retention, termites, or even poor installation.

Safety First:
Drywall that is significantly distended can detach from the framing, posing a risk of falling or collapsing. This is particularly concerning in ceilings. Replacing the affected areas is typically the best course of action.

5. Outdated or Hazardous Materials

Yesterday’s Standards:
Homes built before the 1980s may have drywall containing asbestos, a mineral once popular for its fire-resistant properties but now known to be a health hazard when its fibers become airborne.

Modernize for Safety:
If you suspect your drywall contains asbestos, consult a professional before attempting any renovations. The removal and replacement process requires specialized care to ensure the safety of inhabitants and workers.

Conclusion: An Opportunity in Disguise

While the thought of replacing your drywall might feel daunting, it provides an opportunity to address hidden issues, enhance your home’s energy efficiency, and even refresh its aesthetic appeal. Modern drywall options are also more resistant to moisture, fire, and impacts, ensuring longevity and durability.

If you notice any of the signs mentioned above, it’s prudent to consult with a professional. They can evaluate the extent of the damage and guide you on the best course of action. Remember, proactive maintenance can save you from more extensive (and expensive) repairs down the road. Protect your home, health, and peace of mind by recognizing when it’s time to give your drywall the attention it deserves.

Contact RGZ Cambridge today for all your drywall needs: We are industry leaders in Commercial and Residential projects. Call us today: 613-695-5544 or reach us via this page.

Read More
The Role of Drywall in Noise Reduction

Soundproofing Your Home: The Role of Drywall in Noise Reduction

Whether you’re battling street noise, loud neighbors, or simply trying to create a peaceful sanctuary, soundproofing your home can make a world of difference. A quiet home environment contributes to better sleep, improved focus, and an overall calmer atmosphere. But how do you achieve this tranquillity? Enter drywall, a surprisingly effective tool in your soundproofing toolkit. This blog post will explore how to use drywall for noise reduction and create a serene living space.

The Basics of Soundproofing

Soundproofing aims to reduce sound pressure from a source entering or exiting an enclosed area, like a room. To understand soundproofing, it’s helpful to know about STC (Sound Transmission Class) ratings. Higher STC ratings indicate better soundproofing capabilities. For example, a standard wall with a single layer of drywall may have an STC rating of around 30-34, which can allow normal speech to be understood. Doubling the drywall layers can increase this rating, decreasing the amount of sound that gets through.

Soundproofing and Drywall: The Connection

Drywall, or gypsum board, is a commonly used material in interior construction. Its properties, such as density and flexibility, make it an excellent choice for soundproofing. Special soundproofing drywall, like QuietRock or CertainTeed’s SilentFX, is designed to absorb and dissipate sound vibrations, leading to a quieter environment.

Types of Soundproof Drywall

There are several types of soundproof drywall available:

  1. Regular Drywall: Even standard drywall provides a basic level of soundproofing. Adding more layers of regular drywall can improve this.
  2. Soundproof Drywall: This specialized drywall contains layers of materials like steel, viscoelastic, or ceramics to block sound.
  3. Acoustic Drywall: Acoustic drywall has a high density core for better sound absorption.
  4. Damped Drywall: This incorporates a damping compound between layers to dissipate sound vibrations.

Installation Tips for Soundproof Drywall

  1. Adding Mass: The simplest way to reduce sound transmission is by adding mass to your walls. This could mean installing an additional layer of regular or soundproof drywall.
  2. Damping: Damping involves using materials that absorb sound waves and convert them into heat, reducing the amount of sound that passes through the wall. Damped drywall comes with these materials already included.
  3. Decoupling: This technique involves separating the two sides of a wall to prevent sound from passing directly through. You can achieve this with resilient channels, which provide a break in the path the sound would take.
  4. Sealing Gaps: Sound can sneak through the smallest gaps, so it’s crucial to seal around doors, windows, outlets, and any wall penetrations.

The Role of Insulation in Soundproofing

While this post focuses on drywall, it’s worth noting that insulation also plays a vital role in soundproofing. Insulation materials like mineral wool or acoustic foam help absorb sound and prevent it from passing through walls or ceilings.

Final Thoughts

Soundproofing can drastically improve your quality of life, and drywall is a significant player in this process. By understanding the types of drywall available and how to use them effectively, you can create a quiet, peaceful environment in your home. Remember, it’s not just about blocking out unwanted noise but also about creating a sound balance that works for you and your lifestyle.

Whether you’re planning a new construction project or upgrading your current home, consider the role of soundproofing in your plans. A little silence can be a beautiful thing, and drywall might just be your ticket to a quieter, more serene home.

Contact RGZ Cambridge today for all your drywall needs: We are industry leaders in Commercial and Residential projects. Call us today: 613-695-5544 or reach us via this page.

Read More
repairing drywall

DIY Guide: Repairing Drywall Like a Pro

Drywall is a staple material in the construction of most homes and offices. It’s known for its versatility, affordability, and ease of installation. But like any other building material, it’s not immune to wear and tear, which can result in unsightly holes, dents, or water damage. The good news is, you don’t always need to hire a professional for repairing drywall. With the right tools, materials, and guidance, you can take on this project yourself. Let’s delve into the comprehensive DIY guide on how to repair drywall like a pro.

Understanding the Basics

Before you get started, it’s essential to understand what drywall is. Essentially, it’s a panel made from gypsum plaster, sandwiched between two thick sheets of paper. Drywall comes in different thicknesses, typically 1/4″, 3/8″, 1/2″, and 5/8″. The most common is the 1/2″ for interior walls and ceilings.

Recognizing Common Drywall Issues

Drywall issues can vary, and it’s crucial to identify what kind of damage you’re dealing with. The most common issues include small holes (from nails or screws), large holes (often from door handles or accidents), cracks, and water damage. Each type of damage will require a slightly different repair approach.

Gathering Essential Tools and Materials

To fix drywall, you’ll need the right tools and materials. A standard repair kit might include a utility knife, drywall saw, drywall screws, a screwdriver, joint compound, drywall tape, and a drywall patch for larger holes. Remember to ensure your safety by wearing protective goggles and a dust mask.

Small Holes Repair: A Simple Patchwork

Repairing small holes, like those from nails or screws, is pretty straightforward.

  1. Clean and Prep: Begin by cleaning the area around the hole, removing any loose debris using a utility knife.
  2. Apply the Joint Compound: Once the area is clean, apply a layer of joint compound around the hole.
  3. Install the Patch: Place a self-adhesive mesh patch over the hole, then apply another layer of the joint compound over it. Smooth it out with a drywall knife and let it dry.
  4. Sand and Paint: After it dries, sand the area until it’s flush with the wall. Wipe off the dust and finish by painting over the patch to match your wall.

Large Holes Repair: A Bit More Complex

For larger holes, you’ll need to insert a new piece of drywall.

  1. Cut Out the Damaged Area: Start by cutting out a square around the damaged area using a drywall saw.
  2. Install a Support: Cut two pieces of 2×4 slightly larger than the hole. Insert them into the hole horizontally and secure them with drywall screws.
  3. Cut and Attach the New Drywall: Cut a new piece of drywall to fit the hole, then screw it into the2x4 supports you just installed. Make sure the new piece is flush with the existing drywall.
    1. Seam Treatment: Cover the seams with drywall tape, then apply a layer of joint compound over the tape, extending a couple of inches on each side to blend it with the existing wall.
    2. Sand and Paint: Allow the compound to dry, then sand the area smooth. Wipe away any dust, then paint to match the rest of the wall.

    Cracks and Water Damage: Be Cautious

    Cracks can often be treated like small holes, using a layer of joint compound, sanding, and painting. But recurring cracks may signal more serious structural issues, and you should consider consulting a professional.

    Water damage can lead to mold growth, so it’s essential to find the water source and fix it before repairing the drywall. If the damage is significant, the drywall should be replaced entirely, just like repairing a large hole.

    Final Thoughts

    With a little patience and the right techniques, repairing drywall can be a fulfilling DIY task. It’s a great way to keep your walls looking sharp without hiring a professional. However, if the damage is extensive or the result of a larger issue like a leak or structural problem, it’s always wise to consult with a professional.

    Remember that practice makes perfect. Your first few attempts may not look flawless, but don’t let that deter you. Keep at it, and soon, you’ll be repairing drywall like a pro. Happy fixing!

Contact RGZ Cambridge today for all your drywall needs: We are industry leaders in Commercial and Residential projects. Call us today: 613-695-5544 or reach us via this page.

Read More
professional-drywaller

6 Things to Consider When Hiring a Professional Drywaller

Drywalling is a critical part of the construction or renovation process. It’s an essential component that gives your home or office a finished look. It’s no secret that installing drywall can be challenging and time-consuming, and that’s why most people choose to hire professional drywallers.

Hiring a professional drywaller has many benefits. They have the necessary expertise and experience to do the job efficiently and correctly. However, finding the right professional drywaller can be challenging. To help you make the right decision, here are six things to consider when hiring a professional drywaller.

Experience

Experience is an essential factor to consider when hiring a professional drywaller. You want to make sure that the drywaller you hire has the necessary experience to do the job correctly. Ask the drywaller how many years of experience they have in drywall installation. Check their portfolio and references to see the type of projects they have worked on in the past. An experienced drywaller should have a portfolio of past projects that you can review to assess their expertise.

Licenses and Insurance

Another important factor to consider when hiring a professional drywaller is their licenses and insurance. You want to make sure that the drywaller you hire has the necessary licenses to work in your state. It’s also crucial to ensure that they have liability insurance and workers’ compensation insurance. These insurances protect you in case of any accidents or damages that occur during the installation process.

Quality of Work

You want to make sure that the drywaller you hire produces high-quality work. Ask the drywaller for examples of their work and check for any visible flaws or imperfections. You can also ask for references from their past clients and see if they were satisfied with the work that was done. Look for reviews online or on their website to see if previous customers have had any complaints about their work.

Pricing

Pricing is another essential factor to consider when hiring a professional drywaller. You want to make sure that you’re getting a fair price for the work that’s being done. Ask the drywaller for a detailed quote that includes all the costs involved in the installation process. Compare the quotes of different drywallers to ensure that you’re getting a fair price. However, keep in mind that the cheapest option may not always be the best option.

Availability

The availability of the drywaller is another factor to consider. You want to make sure that the drywaller you hire can work within your timeline. Ask the drywaller for their availability and the estimated time it will take to complete the job. Ensure that you set a realistic timeline that works for both you and the drywaller.

Communication

Communication is key when hiring a professional drywaller. You want to make sure that the drywaller is responsive and can communicate effectively. Ask the drywaller how they prefer to communicate and how often they will provide updates on the progress of the project. You want to ensure that you’re on the same page with the drywaller throughout the installation process.

Conclusion

Hiring a professional drywaller can save you time and money in the long run. However, it’s crucial to consider these six factors before hiring a professional drywaller. You want to make sure that the drywaller you hire has the necessary experience, licenses and insurance, produces high-quality work, offers fair pricing, is available when you need them, and communicates effectively. By taking these factors into consideration, you can ensure that you find the right professional drywaller for your project.

Contact RGZ Cambridge today for all your drywall needs: We are industry leaders in Commercial and Residential projects. Call us today: 613-695-5544 or reach us via this page.

Read More
drywall tools

What Do Drywallers Need? Essential Tools for the Perfect Drywall Job

Drywalling is a delicate and specialized process that requires the right tools for the job. Whether you’re a professional drywaller or an amateur looking to spruce up your home, having the right supplies is essential for achieving a perfect drywall job. Drywallers need special tools to measure, cut, and hang drywall, as well as sand, finish, and patch the surface after installation. The right tools can make a world of difference in the quality of the finished product. From essential items like drywall screws and tape to specialty items like a drywall t-square and corner cutter, read on to learn what drywallers need for the perfect job.

What is drywalling?

Drywall is Sheetrock, a building material used to finish interior walls and ceilings. It comes in 4’ x 8’ sheets of paper covered with gypsum with a paper-fiber mesh. Drywall can be installed either on the studs of a wall or on a cinderblock wall. It is used to finish interior walls and ceilings. Drywall is a relatively new material that’s been used in home construction since the 1970s. It’s become the standard in interior wall finishing because it’s cheap, easy to install, and easy to repair. Drywall is easy to work with, and many people can do it themselves. It can be cut, sanded, and painted, and it also comes pre-finished. In addition to interior walls, drywall is also used for ceiling finishing and for false walls used in construction. Drywall is a great material for home builders, as it’s cheap and easy to install.

Essential tools for drywallers

Drywallers require a variety of tools, many of which are handheld and easy to carry around the job site. Some of the essential tools for drywallers include:

Utility knives – Utility knives consist of a sharp blade on a handle, used for cutting drywall paper, tape, and other materials.

Screwdrivers – Drywall screws are a crucial part of installing drywall, meaning a drywaller must have the right screwdriver for the job. A drywall screwdriver is shorter than a normal screwdriver, with a small, flat head that fits precisely into the slot of the screw.

Tape measure – Although not the most exciting tool, a tape measure is essential for measuring rooms before installation and marking the cuts on the drywall.

Hammer – A hammer is used to drive drywall nails and secure the panels to the wall.

Drywall square – A drywall square is a small, triangle-shaped tool used for marking straight lines on the wall for cutting.

Drywall t-square – A drywall t-square is a long, L-shaped tool used for making precise measurements and cutting lines.

Hanging tools

Drywall hangers – Drywall hangers are used to secure the drywall to the wall studs. Most drywall hangers have a sharp point at the end that’s pushed into the wall, followed by a small piece of metal that secures the drywall. Drywall screwdriver – Drywall screwdrivers have a small, flat head that fits precisely into the slot of a drywall screw.

Sanding, finishing, and patching tools

Drywall sanding tool – Drywall sanding tools are handheld sanding tools that can be used to smooth out rough edges. Drywall finishing tool – Drywall finishing tools come in a variety of shapes and sizes, but they’re all used to apply finishing materials like joint compound. Mixing tray – A drywall finishing tool, the mixing tray is used for mixing drywall joint compound. Drywall joint compound – Joint compound is the primary finishing material used for drywall. It comes in a variety of colors (white, gray, and brown are the most common) and is applied with a trowel or finishing knife. Drywall finishing knife – Finishing knives come in a variety of shapes, but they’re all used to apply joint compound. Drywall trowel – A drywall trowel is a long metal tool used for applying joint compound.

Specialty items

Drywall lift – A drywall lift is a small, portable platform that can be used for lifting and moving large panels of drywall. Drywall tape measure – Drywall tape measures are tape measures specially designed for measuring drywall. They’re longer than traditional tape measures and have a larger, wider tape. Drywall corner cutter – Drywall corner cutters are small, handheld tools that can be used to precisely cut corners on drywall panels. Drywall finish trowel – Drywall finish trowels are long metal tools used for finishing drywall. They’re similar to drywall trowels, but they’re longer and have less of a sharp edge.

Safety equipment

Safety goggles – Safety goggles are used to protect the eyes from debris while sanding and finishing the drywall. Respirator – A respirator is used to protect the lungs from dust while sanding and finishing the drywall.

Additional supplies

Utility knife blades – Utility knife blades are essential for cutting drywall paper and other materials. They dull quickly, so they must be changed regularly. Utility knife handle – Utility knife handles are the part that holds the blade. Some handles are better than others, so it’s important to buy a quality one that fits comfortably in the hand. Hammer – Drywall hammers are lightweight, but can still pack a punch. They’re used for driving drywall nails and securing the panels. Tape measure – It’s important to use a quality tape measure for measuring rooms and marking cuts. Cheap tape measures break easily, which results in inaccurate measurements.

Tips for successful drywall projects

Measure twice, cut once – When measuring and cutting panels, it’s important to do it correctly the first time. It’s better to spend a few extra minutes measuring than to have to redo the work. Plan the layout – It’s important to plan the layout of the drywall before installing it. Drywall panels can be heavy, so it’s important to know where they’ll be placed. Use joint compound to finish the seams – To finish the seams between panels, use joint compound to fill in the gaps and create a seamless finish.

Where to find the right tools

Drywall is a specialized trade, so it’s important to find tools specifically designed for drywallers work. Look for tools that are durable, lightweight, and easy to use. It’s best to buy them from a drywall supply store or online. This ensures that you get the right tools for the job. It’s important to know the difference between a cheap tool and a high-quality tool. Cheap tools break easily and wear out quickly, whereas high-quality tools last much longer. However, high-quality tools are often more expensive than cheap tools. When choosing tools, think about how you’ll be using them. For example, if you’re going to be lifting and moving large panels, a lightweight tool won’t work very well. Instead, opt for a heavier tool that’s easier to use in those situations.

Contact RGZ Cambridge today for all your drywall needs: We are industry leaders in Commercial and Residential projects. Call us today: 613-695-5544 or reach us via this page.

Read More